Hi lovelies! I cannot wait to share this so here I am posting at the wee hours of the morning.
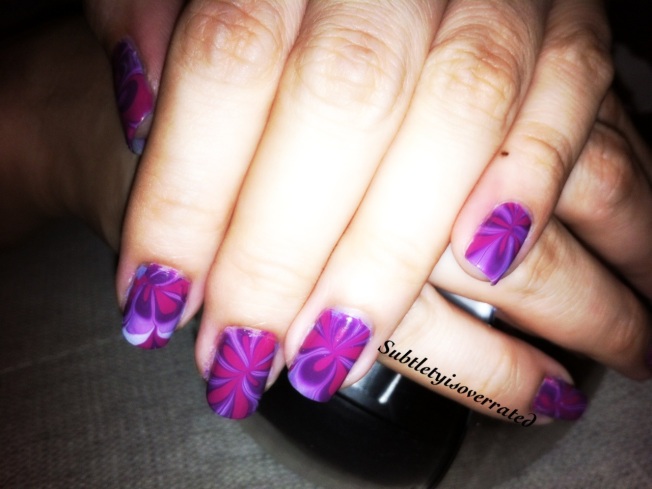
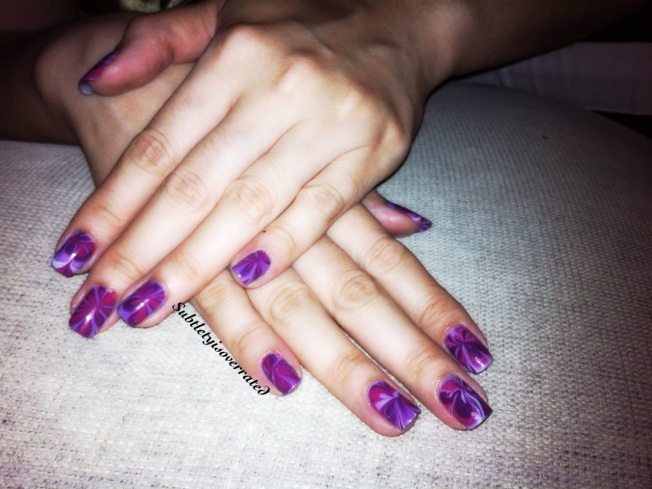
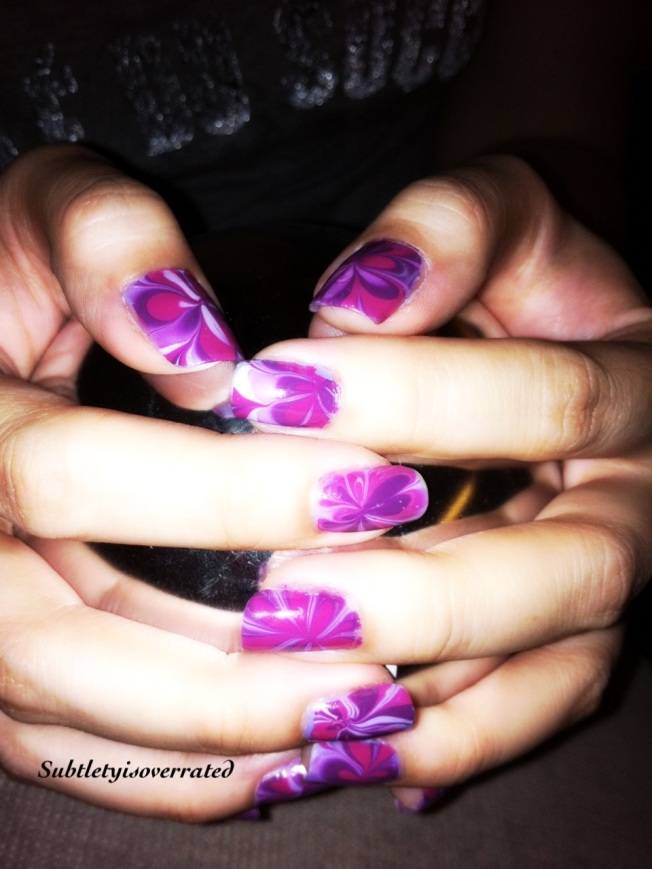
I was really inspired after reading about Susan’s marbling on the subtle shimmer. I really wanted to try the flower water marble design as shown by Aubrey Hannah.
As clear as her instructions were, I want to share more tips on this design.
The problems I faced in the beginning were EPIC.
The polish won’t spread.
Too much polish on the design and after dipping the nail, design was totally ruined.
The flower formation was really hard to form etc etc etc.
I hung on purely cos I was really stubborn and refused to give up. Hehehe so you guys out there who are trying this technique – don’t give up!!
It took me two full days of watching YouTube vids, trail and error to finally get the hang of it (sort of). I do not claim to be an expert at this but at least I can get the design going instead of ending up with a congealed mess of polish(yuks).
To start –
Get ALL your tools ready. I used the following:
– orange stick
– dotting tool or needle or toothpicks. (basically anything fine and sharp)
– Nail polish remover
– Cotton pads ( lots of it )
– kitchen paper
– polish (of course) ^^
– A shot glass (important)
– scotch tape (to wrap around fingers to prevent excess polish sticking to fingers)
Warning – DoNot use polish that is super limited edition cos marbling takes up ALOT of polish.
Findings –
1. Use a small glass or plastic cup. Preferably in the size of a shot glass. I find using a bigger cup means you need to use more polish to create a bigger bulls eye.
2. Use filtered water – I find that it makes a slight difference in how the polish spreads.
3. For the flower design, after you form the ‘flower’ and you still find the centre of the flower messy, simply dip the orange stick to the middle of the bulls eye.
This way, the orange stick will ‘carry’ the excess polish away. This also eliminates the problem of too much polish in the design as this will ruin the whole look when you dip.
4. Do not start dragging the design on the extreme outter ring. Start from the third or forth ring. This way the polish has not formed a film and won’t drag your design.
5. Taping – personally I feel taping is really helpful else you will have to use a colossal amount of remover to get rid of the excess polish.
6. Spreading polish – if the polish floats on top of the water but does not spread, use an orange stick or a pin to swirl gently the outer rim of the polish. This helps to spread the polish.
Overall the whole idea is to ensure a thin layer of polish is ‘floating’ on top of the water. So, the polish has to spread.
Sorry for the long winded post. Check out the results.


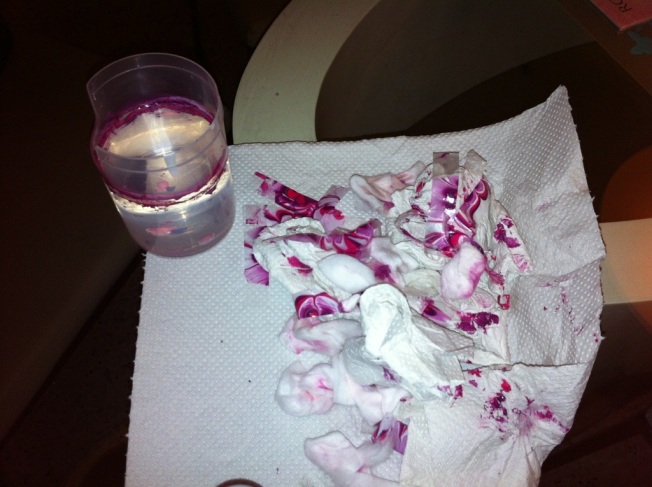
This is the mess that I created. I repeat keep trying and don’t give up!!